
Dhirva Makadiya
In today's complex IT landscape, managing user accounts, permissions, and system configurations across multiple devices can be a daunting task. This is where FreeIPA, a robust open-source Identity, Policy, and Audit (IPA) solution, comes to the rescue. By centralizing these functions, FreeIPA significantly enhances security, streamlines administration, and improves overall system efficiency.
Imagine a world where user provisioning, group management, and access controls are handled from a single, intuitive interface. With FreeIPA, this vision becomes a reality. Instead of juggling multiple configuration files and command-line tools, you gain a centralized platform to manage your entire network's identity infrastructure. This not only saves time but also reduces the risk of human error.
What are the Benefits of Using FreeIPA?
- Enhanced Security: FreeIPA provides a robust framework for implementing granular access controls, protecting sensitive data from unauthorized access. Its support for two-factor authentication and centralized certificate management further strengthens your security posture.
- Simplified User Management: Say goodbye to tedious manual user account creation and management. FreeIPA offers a user-friendly interface for creating, modifying, and deleting users and groups, streamlining administrative tasks.
- Improved Efficiency: By automating routine tasks and providing a centralized view of your network, FreeIPA boosts productivity and reduces operational costs. Centralized Policy Enforcement: Ensure consistent policy enforcement across your entire network by managing user privileges and system configurations from a single location.
- Scalability: FreeIPA is designed to handle environments of all sizes, from small networks to large enterprise deployments.
- Cost-Effective: As an open-source solution, FreeIPA eliminates licensing fees, making it a cost-effective choice for organizations of all budgets.
Step-by-Step Guide to FreeIPA on AWS EC2
1. Building Your Foundation: Provisioning EC2 Instances
The journey to a secure and efficient network begins with a solid infrastructure. Start by launching two Amazon EC2 instances:
- FreeIPA Server: This instance will serve as the central authority for managing user identities and policies.
- FreeIPA Client: This represents a typical system in your network that will be managed by the FreeIPA server.
Key Considerations
- Choose appropriate instance types based on your network size and expected load.
- For enhanced security, consider using EC2 Key Pairs for SSH access instead of password-based authentication.
- Assign Elastic IP (EIP) addresses to both instances for static public IPs if external access is required.
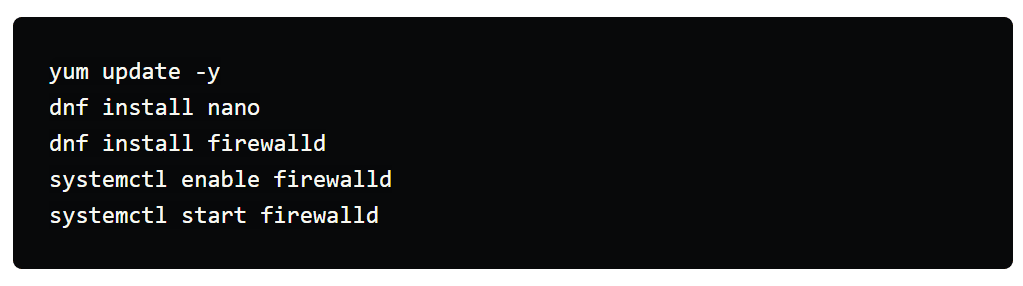
2. Setting Up the FreeIPA Server
- Updating the system packages
- Installing necessary tools like nano for text editing and firewalld for managing network traffic
- Configuring DNS records (we'll come back to this in a bit)
- Installing the FreeIPA server and DNS packages
- Opening firewall ports for essential FreeIPA services like DNS, NTP, and Kerberos
- Initializing the FreeIPA server with your desired domain name and IP address
- Obtaining a ticket-granting ticket for administrative access using the kinit command
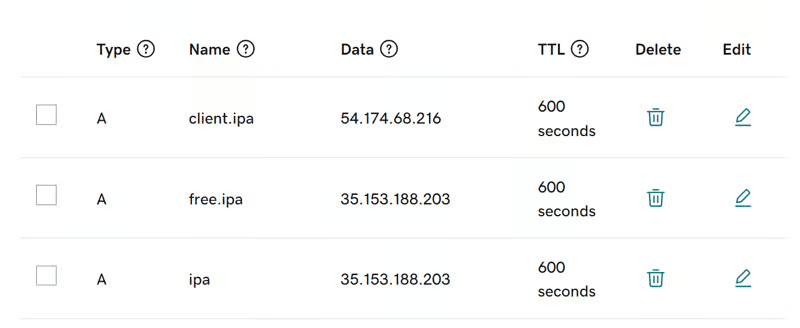
3. Configuring DNS Records
For seamless communication between your FreeIPA server and client, you'll need to create DNS records. This typically involves logging into your domain registrar (like GoDaddy) and setting up the following records:
- <code>ipa.yourdomain.info</code>: Points to the public IP address of your FreeIPA server.
- <code>free.ipa.yourdomain.info</code>: Points to the public IP address of your FreeIPA server.
- <code>client.ipa.yourdomain.info</code>: Points to the public IP address of your FreeIPA client.
4. Configuring the FreeIPA Server
With the groundwork laid, it's time to install FreeIPA:
This involves:
- Updating system packages on the client machine [image: update_system_package.png]
NOTE: Remember the following values while setting up FreeIPA server DNS
Hostname: <code>free.ipa.letsgoanywhere.info</code>
Domainname: <code>ipa.letsgoanywhere.info</code>
IP: <code><Private ip of IPA server></code>
Continue to configure system with these values: <code>yes</code>
To obtain a ticket-granting, run the following command: <code>kinit admin</code>
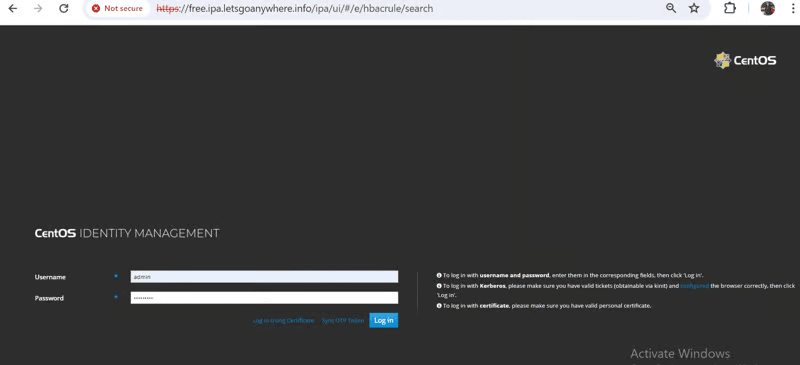
Access FreeIPA web UI using the FreeIPA Server's public IP. Log in as admin with the admin password.
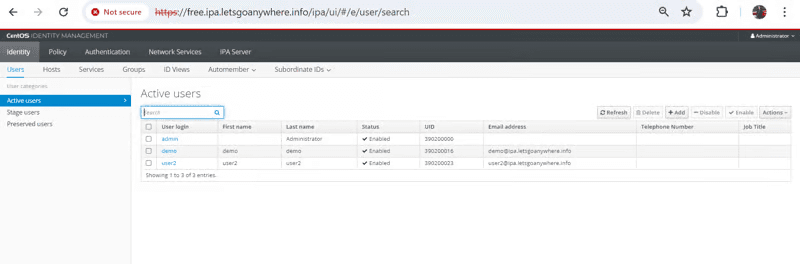
Add a new user and explore user management features. By default only one admin user is present.
5. Configuring the FreeIPA Client
Now, let's integrate a client into the FreeIPA realm:
- Prepare the Client: Update system packages and install necessary tools on the client instance.

NOTE: Remember the following values while setting up the FreeIPA client
Proceed with fixed values and no DNS discovery: yes (Check all client and server hostnames and domain names)
Continue to configure the system with these values: <code>yes</code>
User authorized to enroll computers: <code>Username: admin and Password: <which we had set up for IPA admin server setup></code>
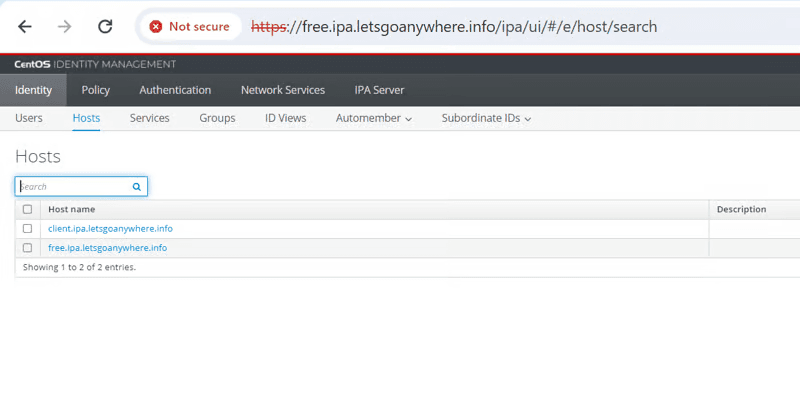
After the server and client are connected it will show two hosts in FreeIPA server. Initially, before the client setup, there was only one host present.
6. Testing
Before diving into advanced features, verify that your FreeIPA server and client can communicate:
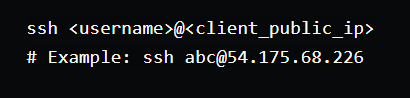
- SSH into the Client: From the FreeIPA server, establish an SSH connection to the client:
Restricting SSH Access to a Specific Client
We aim to configure FreeIPA to allow only specific users to SSH into a particular client system. This is achieved through Host-Based Access Control (HBAC) rules.
1. Create a Target User
- Use the FreeIPA web interface or command-line tools to create a user account (e.g., <code>demo</code>).
- Assign necessary permissions and attributes to the user.
2. Disable Default HBAC Rules
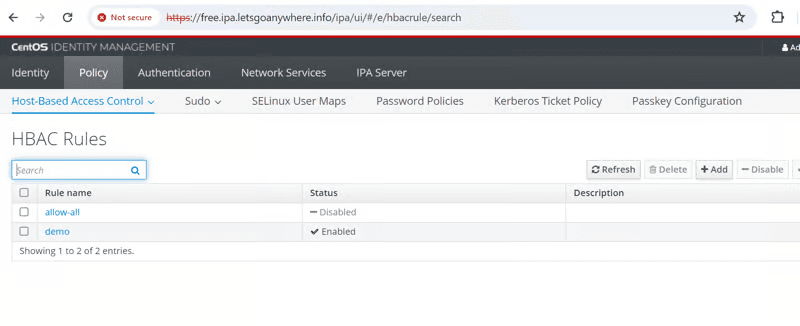
- Access the FreeIPA web interface and navigate to the "Policy" section.
- Locate the "HBAC rules" tab.
- Disable the default "allow_all" rule to prevent unrestricted SSH access.
** 3. Create a New HBAC Rule**
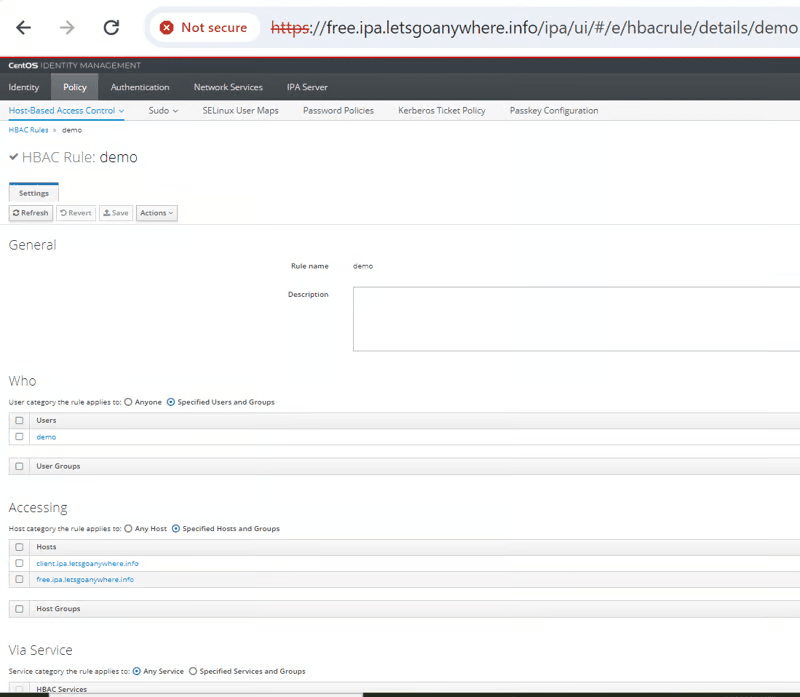
- Click the "Add" button to create a new HBAC rule.
- Configure the rule as follows: -- Who: Specify the target user (e.g., <code>demo</code>). -- Host: Select the target client system. -- Service: Choose <code>ssh</code>. -- Action: Allow access.
- Save the rule.
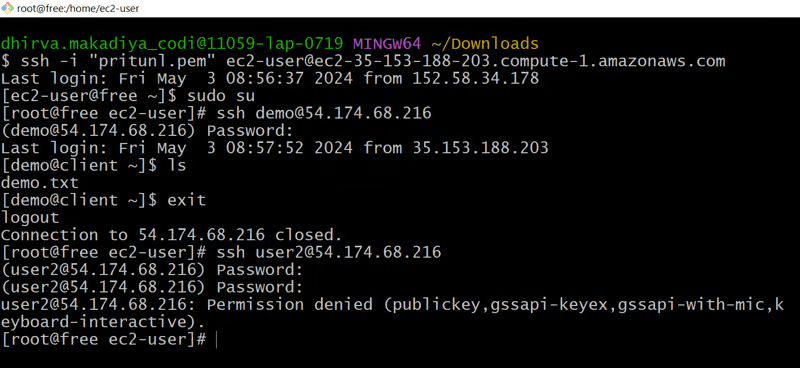
4. Testing
- Attempt to SSH into the target client using the demo user. The connection should be successful.
- Try to SSH using a different user (e.g., user2). The connection should be denied.
Restricting Sudo Commands
We aim to control which commands a user can execute using <code>sudo</code> on a client system. This is achieved by managing sudo commands and rules within FreeIPA.
1. Manage Sudo Commands
- Access the FreeIPA web interface and navigate to the "Policy" section.
- Locate the "Sudo" tab and then the "Sudo commands" subtab.
- Add the desired commands (e.g., <code>touch</code>) to the list of available sudo commands.

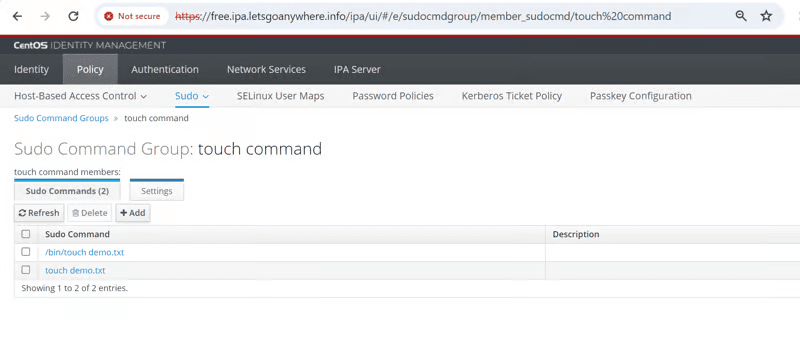
2. Create a Sudo Command Group
- Create a new sudo command group (e.g., <code>limited_sudo</code>) and add the desired commands to it.
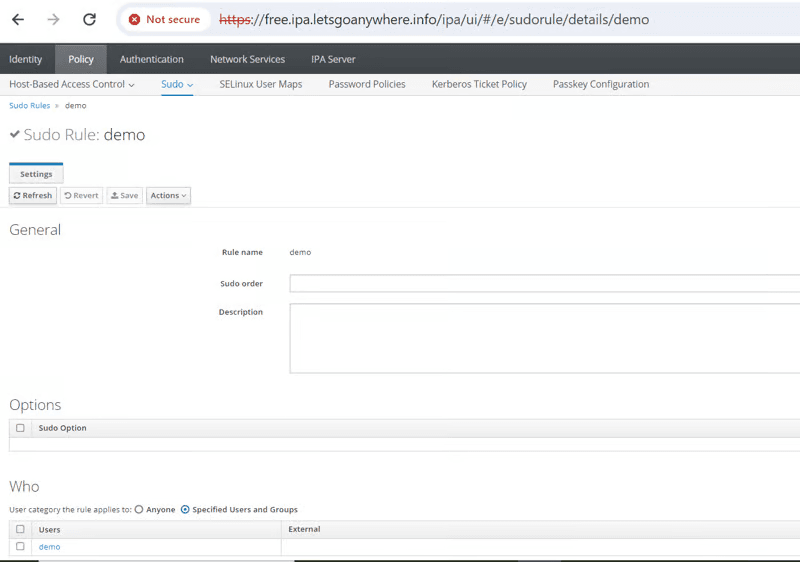
3. Create a Sudo Rule
- Create a new sudo rule.
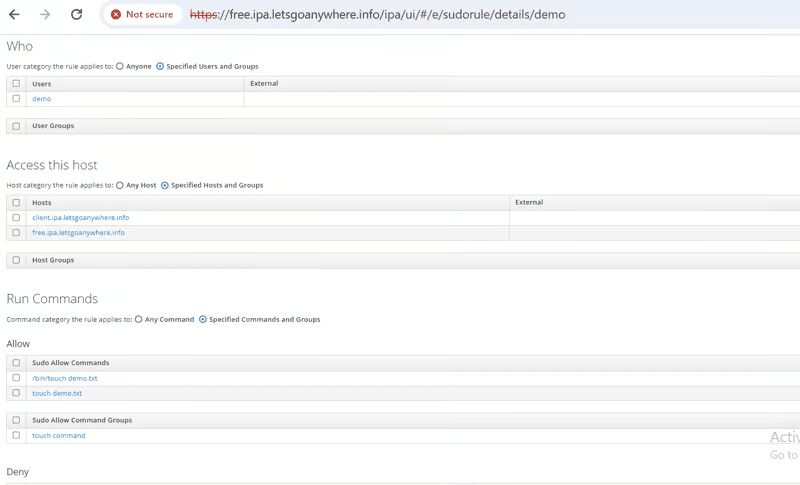
- Specify the target user (e.g., <code>demo</code>).
- Assign the created sudo command group (e.g., <code>limited_sudo</code>) to the user. Save the rule.
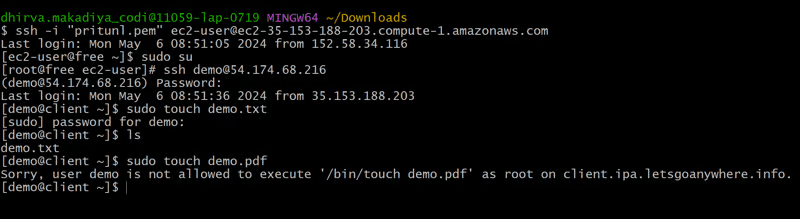
4. Testing
- Log in as the <code>demo</code> user and attempt to execute <code>sudo touch demo.txt</code>. The command should be successful.
- Try to execute <code>sudo touch demo.pdf</code>. The command should be denied.
Conclusion
By effectively implementing FreeIPA's user management and access control features, you can significantly enhance your organization's security posture. Through careful configuration of HBAC rules and sudo permissions, you gain granular control over user access to systems and resources.
Remember, a robust FreeIPA deployment is an ongoing process. Regular review, testing, and updates are essential to maintain its effectiveness. By investing time in understanding and utilizing FreeIPA's capabilities, you can build a resilient and secure IT infrastructure.