
Sushant Patil
The world of DevOps thrives on automation. Jenkins, a widely-used automation server, simplifies the process of building, testing, and deploying applications. But with great power comes great responsibility...and sometimes, a hefty cloud bill. This is especially true if you have idle Jenkins slave instances constantly running in the background.
Here's the good news: there's a strategic solution to optimize your Jenkins environment and slash those costs. This blog post taps into the power of AWS EC2 Spot Instances and the Jenkins EC2 Plugin. By leveraging this dynamic duo, you can provision and terminate build agents (slave instances) on-demand, ensuring you only pay for the resources you actually use.
Why Consider Spot Instances?
Traditional on-demand EC2 instances offer reliable performance, but they come at a fixed price. This can be a drain on your budget, especially for workloads that are spiky or only require compute resources during specific build phases.
Spot instances are a game-changer for cost-conscious DevOps teams. They are essentially spare EC2 instances that Amazon Web Services (AWS) makes available at a discounted price. The catch? AWS can interrupt these instances if the market price for that instance type goes up. However, spot instances offer a significant cost advantage for workloads that can tolerate short interruptions.
Here's a breakdown of how spot instances benefit your Jenkins environment:
- Cost Savings Champion: Spot instances can be significantly cheaper than on-demand instances. This is perfect for those intermittent build processes that only require resources for short bursts during builds and tests.
- Storage Efficiency Hero: Say goodbye to paying for idle slave instances! Dynamic provisioning with spot instances eliminates the need for constantly running slaves. This frees up storage space and optimizes your overall resource utilization.
- Fresh Start, Every Build: With spot instances, each build gets its own clean EC2 instance. This ensures a consistent and isolated environment for testing and deployment, minimizing the risk of lingering configuration issues from previous builds.
Understanding the Trade-offs
While spot instances offer undeniable advantages, there are a few things to keep in mind:
- Provisioning Time: Spinning up new spot instances takes a few minutes. This can introduce a slight delay to your overall build times compared to using on-demand instances.
- AMI Management: Creating a custom AMI (Amazon Machine Image) with the necessary tools pre-installed on your spot instances can require some upfront effort. Additionally, any changes to the build environment necessitate updating the AMI as well.
Building Your Cost-Optimized Workflow: A Step-by-Step Guide
Now that we understand the "why" behind using spot instances with Jenkins, let's walk through the steps to set up your cost-optimized workflow:
Step 1: Setting up Jenkins Master
First things first, ensure you have a server with Jenkins installed and configured as the master node. If you're new to Jenkins, the official installation guide is your friend!(Link to official Jenkins installation guide)
Step 2: Craft a Custom AMI
While not strictly mandatory, creating a custom AMI with the required tools and dependencies pre-installed can significantly speed up the provisioning process for your spot instances. This ensures a consistent environment for your builds. (Note: Java is a must-have on this AMI).
Looking for a Shortcut? The AWS Marketplace offers a variety of pre-configured AMIs that can save you the hassle of managing your own custom image.
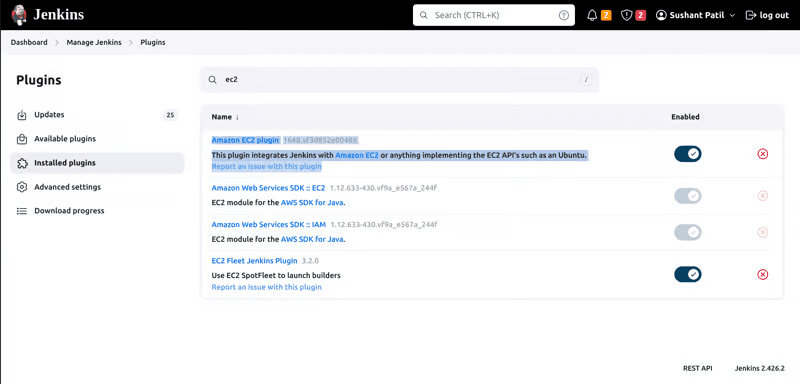
Step 3: Install the EC2 Plugin
Head over to the Jenkins Dashboard and navigate to "Manage Jenkins" followed by "Manage Plugins." In the "Available" tab, search for "EC2" and install the Jenkins EC2 Plugin. This plugin acts as the bridge between Jenkins and your spot instances.
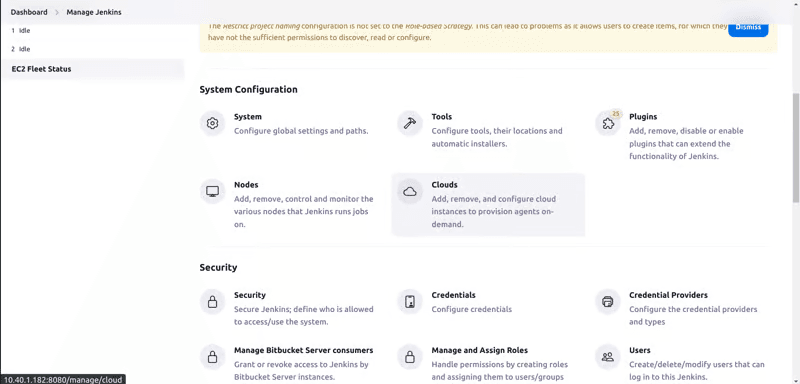
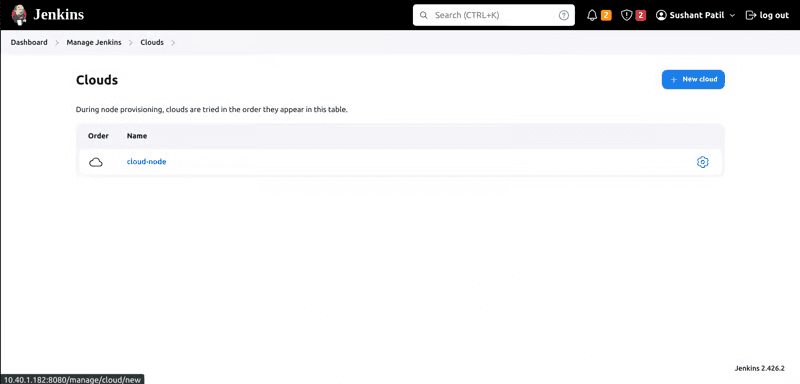
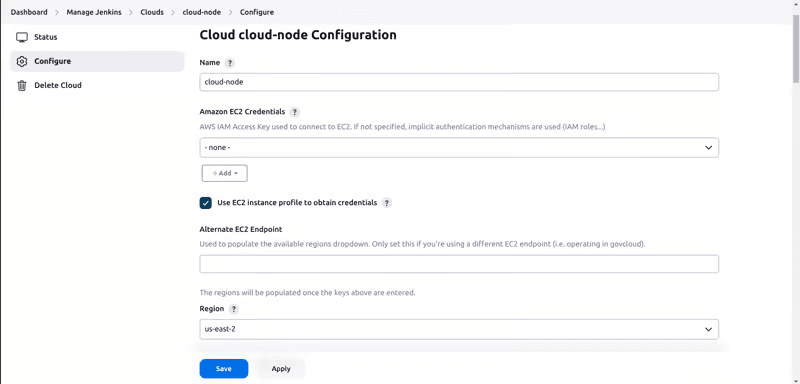
Step 4: Configure the EC2 Plugin
From the "Manage Jenkins" section, select "Cloud" to configure your slave settings. This is where you'll define how Jenkins interacts with your spot instances.
Step 5: Setting the Right Bid Price
Finding the sweet spot for your bid price is crucial. A very low bid price might result in your spot instances being interrupted frequently. On the other hand, setting the price too high might negate the cost savings benefit. A good rule of thumb is to add a buffer to the on-demand price for your chosen instance type. This helps ensure the stability of your spot fleet.
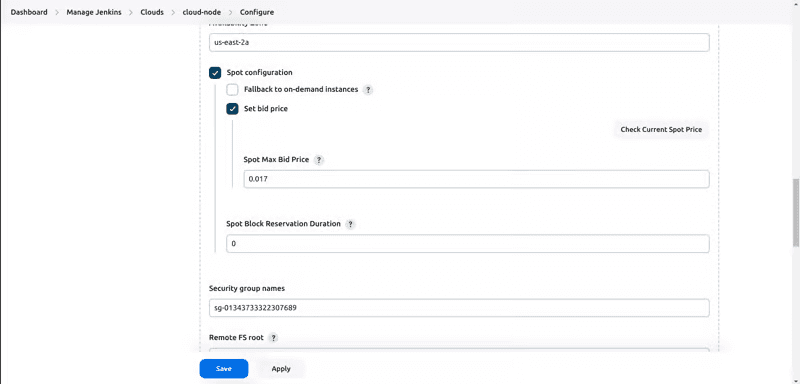
Step 6: AMI Selection
Specify the AMI ID of your custom image here, or choose an option from the AWS Marketplace if you went with the pre-configured route.

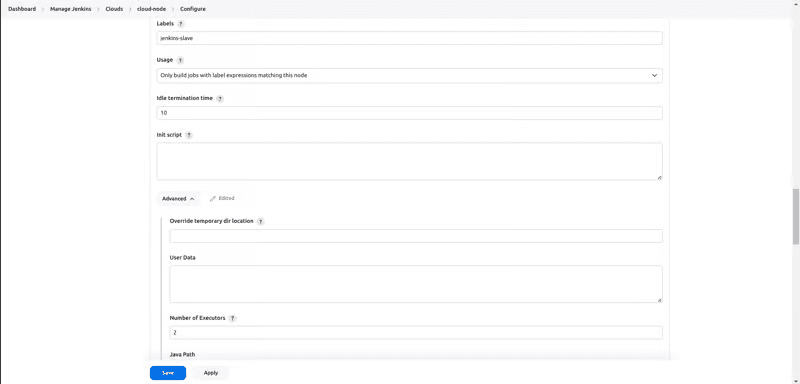
Step 7: Labels and Idle Termination
Assigning a label to your slaves helps differentiate them from the master node. This is important for scheduling workloads on specific agents. For example, you might have a Jenkinsfile (pipeline script) that needs to run on a slave with specific tools installed. The label allows you to target the appropriate agent for the job.
Another crucial step is setting an idle termination time. This ensures that spot instances are automatically terminated if they remain unused for a designated period (e.g., 10 minutes). This helps you avoid unnecessary charges for idle resources.
Step 8: Testing Your Configuration
With everything configured, it's time for a test run! Create a simple Jenkinsfile that leverages the label you assigned to your slaves. This script can be a basic command like "echo hello world." Run the job and monitor the Jenkins console. If the job executes successfully and you see the output from the slave instance, congratulations! Your Jenkins environment is now configured to utilize spot instances.
Putting it All Together: A Sample Pipeline
Here's an example Jenkinsfile that demonstrates how to leverage the configured Jenkins slave:
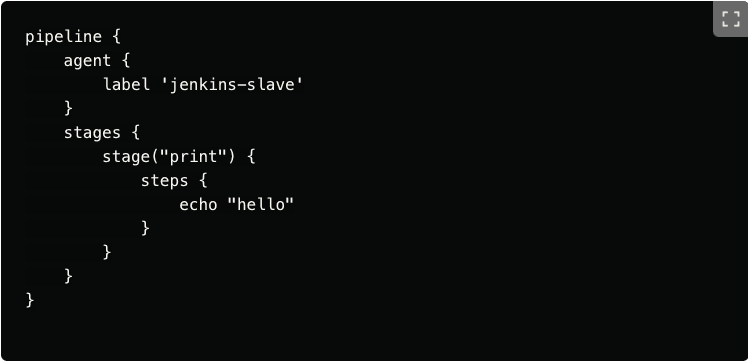
This script defines a Jenkins pipeline, a collection of stages representing different steps in your build or deployment process. Let's break down the code line by line:
- pipeline {: This line marks the beginning of the pipeline definition.
- agent {: This block defines the agent (slave) on which the pipeline will execute.
- label 'jenkins-slave': This line specifies that the pipeline should run on a slave agent with the label "jenkins-slave." This label corresponds to the label you assigned to your slaves during the configuration process (Step 7: Labels and Idle Termination).
- stages {: This block defines the different stages within the pipeline. In this example, we have a single stage named "Hello World."
- stage('Hello World') {: This line defines the "Hello World" stage.
- steps {: This block defines the steps that will be executed within the stage.
- echo: This step uses the echo command to print the message "hello world" to the console.
- } : Closing curly braces mark the end of each code block.
Running the Pipeline
With the Jenkinsfile saved, you can trigger the pipeline execution in Jenkins. When the pipeline runs, it will attempt to provision a spot instance with the label "jenkins-slave." Once the instance is available, the pipeline stages and steps will be executed on that instance. If you monitor the Jenkins console during execution, you should see the output "hello world" printed, indicating successful execution on the slave instance.
This is a very basic example, but it demonstrates how to leverage the configured Jenkins slave within a pipeline. You can create more complex pipelines with multiple stages and steps to automate various tasks in your build and deployment process.
Conclusion
You can achieve significant cost savings while optimizing your Jenkins workflows by using AWS EC2 Spot Instances with the Jenkins EC2 Plugin. The upfront investment in creating a custom AMI is quickly offset by the ongoing reduction in cloud bills. So, ditch those idle instances and embrace a more dynamic and cost-effective approach to your Jenkins builds!
Hopefully, you are now equipped with the knowledge and steps to set up your Jenkins environment to utilize spot instances. Remember, the key is to find the right balance between cost savings and potential interruptions. With careful planning and configuration, you can harness the power of spot instances to streamline your DevOps processes without sacrificing performance or reliability.