Nikhilesh Gandhe
The container revolution has transformed how we build and deploy applications. Kubernetes, the container orchestration leader, streamlines this process by automating the deployment, scaling, and management of containerized applications. It ensures these applications are highly available, resilient to failures, and easily scalable to meet changing demands.
However, while managed Kubernetes services like Amazon EKS or Google GKE offer a convenient out-of-the-box experience, they come with limitations. These services can be expensive, lock you into a specific cloud provider's ecosystem, and limit your control over the underlying infrastructure.
This is where a self-managed approach with Kubespray shines. Here's why you might consider taking control of your own Kubernetes cluster:
- Flexibility: Tailor your cluster configuration to suit your specific needs and infrastructure perfectly. This allows you to optimize resource utilization and leverage the hardware you already own.
- Cost-Effectiveness: Eliminate recurring fees associated with managed services. While setting up a self-managed cluster requires an initial investment of time and effort, it can be significantly more cost-efficient in the long run, especially for resource-intensive deployments.
- Control: Have complete control over your cluster configuration and security. Managing your own cluster gives you the freedom to customize settings, integrate with specific tools, and enforce stricter security policies.
Why Kubespray? Your Path to a Production-Ready Cluster
While various tools exist for setting up Kubernetes clusters, Kubespray stands out for its user-friendliness and powerful features:
- Declarative Configuration: Kubespray utilizes variables and inventory files to define your desired cluster state. This approach simplifies management and makes it easy to track changes and configuration drift.
- Customization with Ansible Playbooks: Ansible playbooks automate the entire cluster deployment process. These playbooks are modular and can be customized to tailor the cluster configuration to your specific needs.
- Platform Agnostic: Kubespray is platform agnostic, meaning it can be used to deploy Kubernetes clusters on various platforms, including on-premises infrastructure, bare-metal servers, or within cloud environments like AWS and OpenStack (with the aid of Terraform modules).
- Rich Ecosystem Integration: Kubespray integrates seamlessly with various Kubernetes components, giving you flexibility when choosing storage solutions, container runtimes, and Container Network Interfaces (CNIs) to suit your specific needs. We'll delve deeper into these options later in the blog.
Building Your Kubernetes Playground with Kubespray - Step-by-Step
Before diving into the specific steps, ensure you have a few essential pre-requisites in place:
- Latest Python Version: Kubespray utilizes Python for automation. Ensure you have the latest version of Python installed on your local machine.
- Virtual Environment: Creating a virtual environment isolates project dependencies, preventing conflicts with other projects that might rely on different Python packages.
Now, let's explore the steps involved in setting up your Kubernetes cluster using Kubespray:
1. Activate the Virtual Environment
<code> source virtualenv/bin/activate </code>
2. Clone the Kubespray Repository from GitHub
<code> git clone https://github.com/kubernetes-sigs/kubespray.git </code>
3. Copy the Sample Inventory Directory
<code> cp -rfp inventory/sample inventory/mycluster </code>
4. Install the Required Python Packages
<code> python -m pip install -r requirements.txt </code>
5. Declare an Array with the IP Addresses of Your Servers
<code> declare -a IPS=(SERVER_IP) </code>
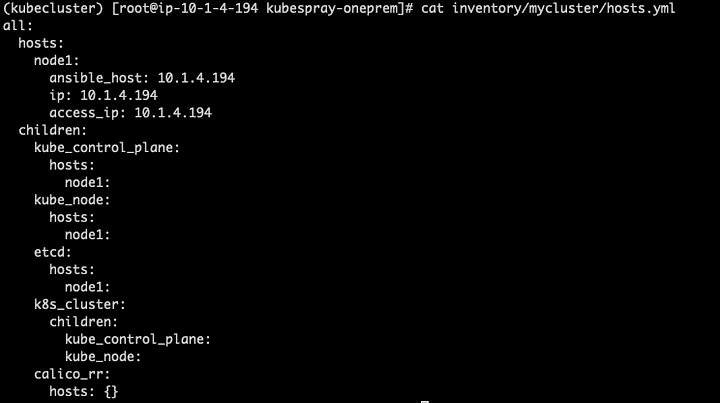
6. Generate the Inventory File
<code> CONFIG_FILE=inventory/mycluster/hosts.yml python3<br/> contrib/inventory_builder/inventory.py ${IPS[@]} </code> <br/>
Confirm the hosts.yml file
7. Generate an SSH Key Pair
<code> ssh-keygen </code>
8. Copy the SSH Key to the Root User on the Server
<code> ssh-copy-id root@<SERVER_IP> -i <private_key> </code>
9. Run the Ansible Playbook to Set Up the Kubernetes Cluster
<code> ansible-playbook -i inventory/mycluster/hosts.yml - become - become-user=root - private-key=<private.key> cluster.yml </code> <br/>
Once the cluster is up, you will get an output confirming its success.

10. Verify Your Cluster and Deploy a Sample App
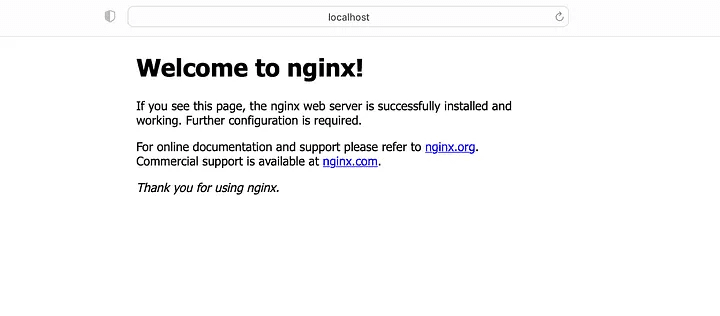
To verify your setup, create a simple Nginx deployment: <code> kubectl create deployment nginx - image=nginx<br/> kubectl expose deployment nginx - port=80 - name=nginx-service </code> <br/> Now port forward the service and check if it is working from local: <code> kubectl port-forward <pod-name> <local_port>:<service_port> </code>

Hit the local URL on browser:
Beyond the Basics: Customization Options
Kubespray offers extensive customization options. By default, it installs:
- Control Plane Storage: ETCD
- Container Runtime Interface (CRI): Containerd
- Container Network Interface (CNI): Calico
You can further customize by choosing from a wide range of options for:
- Control Plane Storage: ETCD or alternative solutions.
- Container Runtime: Containerd, Docker, CRI-O, Kata Containers, and more.
- Container Networking: Calico, Canal, Cilium, Flannel, and various other plugins.
Troubleshooting Tips
While Kubespray simplifies the setup, you might encounter occasional errors. Here's how to navigate them:
- Review Output Messages: These often provide clues to common issues like Python version mismatches or OS incompatibility.
- Kubespray Documentation and Community: Refer to the official documentation and community forums for solutions and troubleshooting guides.
- Ansible Playbook Customization: Advanced users can modify existing Ansible tasks within the Kubespray repository.
By following these steps and leveraging Kubespray's power, you'll be well on your way to managing your own production-ready Kubernetes cluster. Now, you have the flexibility to deploy and scale containerized applications with ease, maximizing their reach and efficiency.